We’ve migrated to DigitalOcean! (Various reasons, more on that later.) The process was straightforward, for the most part. The few snags were relatively easy to resolve (the main one was figuring out how to change the default DigitalOcean Wordpress install to use the migrated tables).
Create a DigitalOcean Droplet
Use »>THIS LINK««/span> to sign up for $10 free in DigitalOcean services (that’s 2 free months at the lowest tier, with no committment!).
Sign into your DigitalOcean account and click the Create Droplet button next to your profile picture.
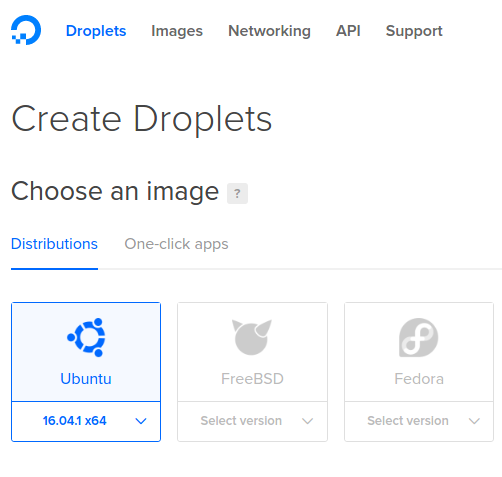
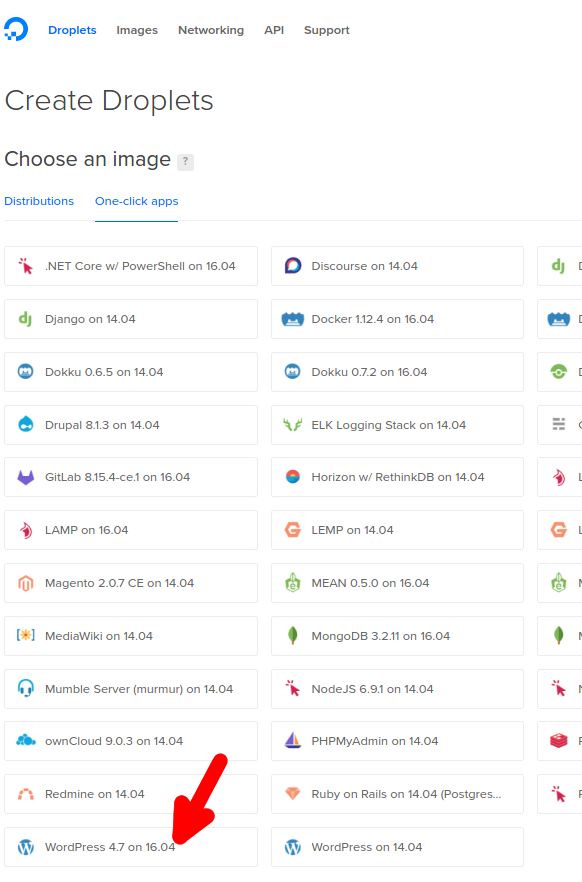
Choose an image (default is Ubuntu, which is fine), and the WordPress 4.7 One-click app.
Choose your pricing tier and leave everything else defaulted, unless you want to customize your hostame or add SSH keys. Click the Create button. This will set up all the files you’ll need for a WordPress site. We’ll overwrite some of these and change others later to import our Bluehost files. If you aren’t migrating, congratulations! You’re done! If you are migrating, read on.
Connect to your droplet via ssh and set up your keys
Check out SSH and SCP: Howto, tips & tricks over at the Linux Academy Blog for more details on SSH and SCP.
Generate an ssh key locally if you haven’t already.
|
|
Copy your public key to your droplet, using your droplet’s root user and password (provided to you when you generated the droplet). If you can’t find that information, go to the Access section of your droplet and click “Reset Root Password” to restart your droplet and have a new password emailed to you.
|
|
Connect to your droplet.
|
|
Add your public key to your authorized_keys file, so you can ssh without a password.
|
|
Back up your Bluehost Wordpress files
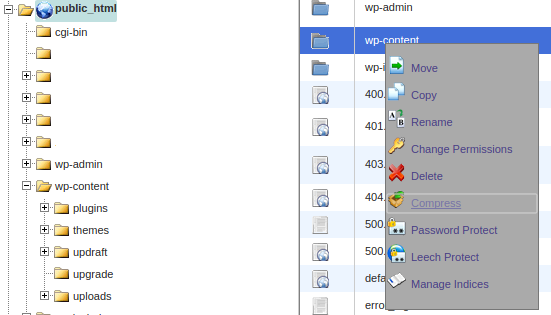
Go to Bluehost cPanel and access the File Manager (cPanel > files > File Manager).
Backup public_html/wp-content/ as a .zip file (right-click > Compress). Find the new wp-content.zip file and download it (right-click > Download).
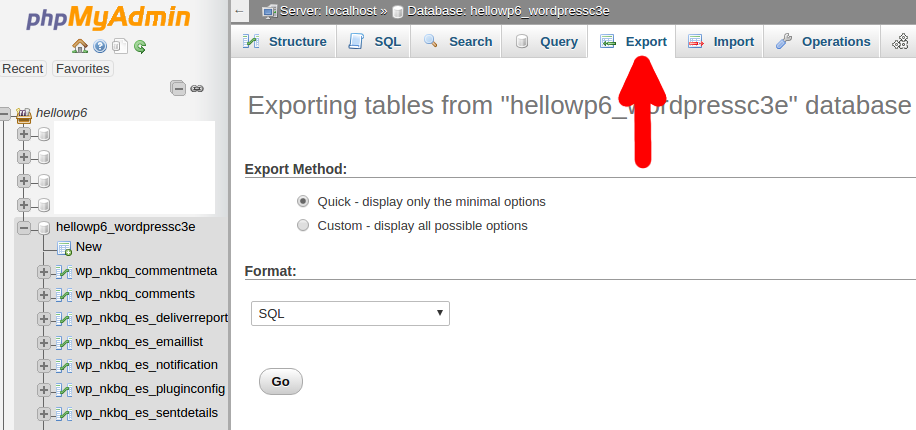
Go to Bluehost cPanel, access phpMyAdmin (cPanel > database tools > phpMyAdmin).
Click your database in the list on the left, then click the Export tab. The default settings work fine here, so just click the Go button.
You should now have 2 files: wp-content.zip and your-database.sql.
Get the files onto your droplet
Use scp to move your-database.sql and wp-content.zip to your droplet.
|
|
Install the wp-content files
First, install the zip and unzip libraries on your droplet (This was one of the reasons we wanted to migrate from Bluehost to DigitalOcean: every droplet has full sudo! The low-tier BH did not). Then, unzip wp-content.zip.
|
|
Install your schema
Execute this command in the DigitalOcean shell (wordpress_mysql_pass is in /root/.digitalocean_password):
|
|
Log in to the mysql console and verify your tables were correctly added.
|
|
You can add admin users here if you like, with the following statements.
|
|
Next, you’ll want to update the prefix in your wp-config.php file so the correct database tables get accessed by WordPress.
From your console (sshd into your droplet), open the /var/www/html/wp-config.php file.
|
|
Find the following line:
|
|
And change the value to whatever prefix your Bluehost tables have (ours was wp_nkbq_).
|
|
Save the file and exit. That should be all the configuration needed to access your Wordpress blog using the public IP of your droplet. But using the public IP to access a blog is hokey. It makes people nervous. Search engines probably don’t like it. Let’s apply your domain name to make everyone feel better.
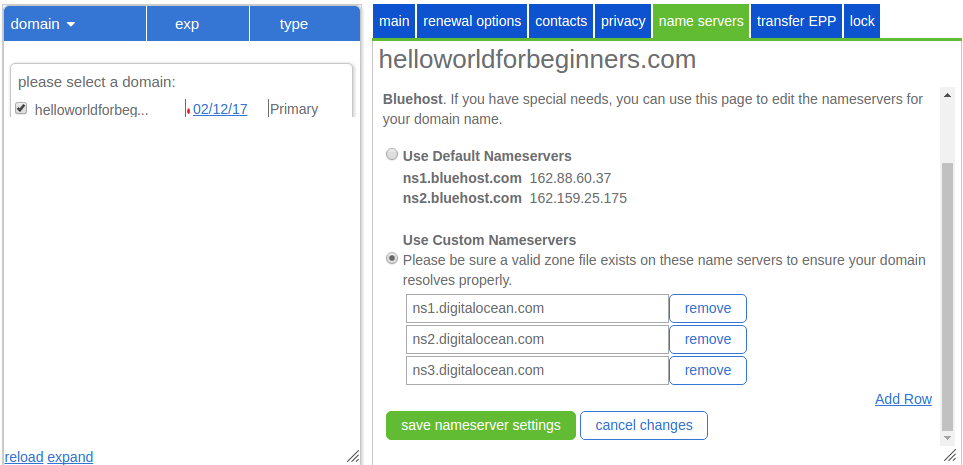
Update your Nameserver
Our domain is still hosted at Bluehost, so we just updated the name servers there. Go to Bluehost’s domain manager (cPanel > Domains > Domain Manager). Click on your domain in the list on the left, then go to the name servers tab. Add the three DigitalOcean name servers.
|
|
Point your domain to your droplet
Add your domain
Go to the networking tab, fill out the field with the placeholder text ‘Enter Domain’ and click ‘Add Domain’.

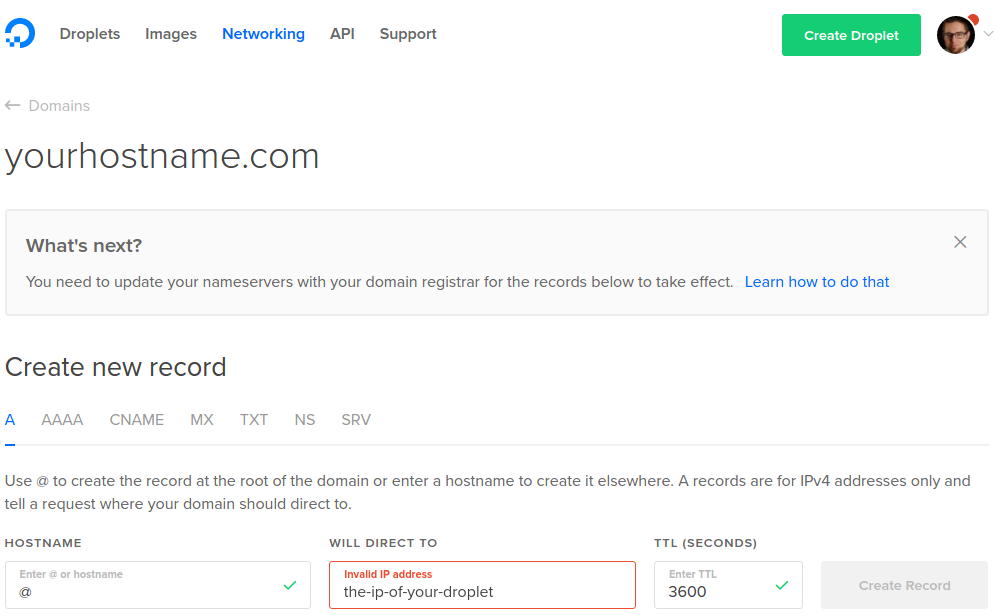
Add your ‘A’ record
This should bring you to the DNS records page. Add an ‘A’ record (this will take care of yourhostname.com). Use @ for the HOSTNAME field, and your droplet’s public IP for the WILL DIRECT TO field.
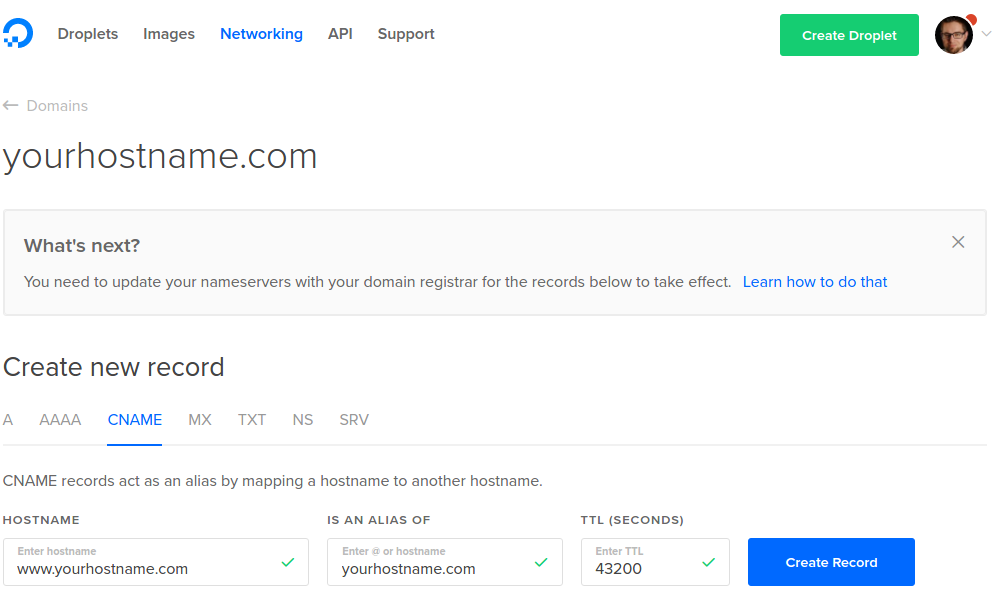
Add your ‘CNAME’ alias
A ‘CNAME’ record is an alias. It will redirect www.yourhostname.com to yourhostname.com (which will redirect to your droplet’s public IP.) Use www for the HOSTNAME field, and yourhostname.com for the IS AN ALIAS OF field.
All set!
You should be all set up. The name servers may take a few hours to update, but your SEO and traffic should transfer over without any issues.