Heroku is a fantastic service that lets you get your app on the web quickly, for free (with the base model).
If you followed my previous post Django, A Framework for Python Web Apps, then you already have most of the tools you need to publish your work on the web for demoing and testing purposes. The final step is hosting your project on Heroku.
Publishing an update to Heroku is as easy as a git remote push (in fact, that’s all there is to it!) Heroku then recognizes the language you’re using and automatically downloads your dependencies, applies your static content, and builds your website from your repository! There are some limitations surrounding what Heroku refers to as dynos, but the important thing is that you’ll be able to get your project hosted with no startup cost, which is useful for testing, sharing your progress, and even using the finished app. I’ve been hosting and USING my recipes, notes, and chores apps for 6+ months and it hasn’t cost me a single cent.
10 Steps to Hosted!
- Step 1: Pull Your Remote GitHub Repository
- Step 2: Install PostgreSQL and Python-Dev
- Step 3: Set Up and Activate Your Virtual Environment
- Step 4: Install Heroku to your Virtual Environment
- Step 5: Create a Requirements File
- Step 6: Add Packages to the Requirements File
- Step 7: Sign Up for Heroku
- Step 8: Configure Your Project for Heroku
- Step 9: Add to Git and Commit
- Step 10: Apply the Migrations
- Step 11: Actually, It Goes to Eleven
Step 1: Pull Your Remote GitHub Repository
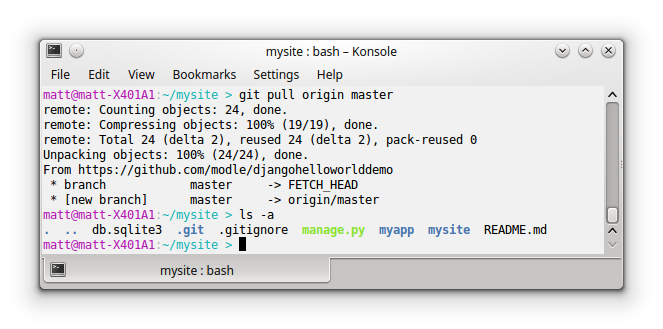
First, let’s pull our repository from GitHub, just so that we can keep it in sync with what we’ll be pushing to Heroku. If you’ve made changes of your own, you’ll want to first move (mv mysite newname) or delete (rm -rf mysite) your existing mysite folder. Of course, feel free to use your own project, though you may need to tweak the setup slightly to get Heroku to build it out properly.
|
|
We should see all our files from the GitHub repository, and the git log should have two commits.
Step 2: Install PostgreSQL and Python-Dev
Django projects on Heroku use PostgreSQL by default, so we’ll need to install PostgreSQL on our machine. The library libpq-dev provides the client-side requirements for a PostgreSQL application. This is not a Python specific library, and has to be installed with apt-get rather than pip.
We’ll also need the python-dev library in order to run our database adapter.
|
|
Step 3: Set Up and Activate Your Virtual Environment
If you haven’t already, you’ll want to create a virtual environment for your project. Otherwise, when we install Heroku, it will install in the base Python environment.
The first command will create the virtual environment, and the second will activate it. Once activated, (venv) will appear at the start of each command entry line in your terminal window.
NOTE: be sure to add venv/ to your .gitignore to avoid adding it to your repository.
|
|
If you need to disable the virtual environment:
|
|
Step 4: Install Heroku to your Virtual Environment
|
|
Step 5: Create a Requirements File
A requirements file captures all of the package requirements for your particular project. It also expedites the package install process by allowing you to install all project package dependencies with a single command, rather than one line at a time. This file can be stored anywhere within your project directory; I prefer to keep it at the root.
First, create the requirements.txt file by using the following command. This command will capture all current dependencies of your project and store them in a file.
|
|
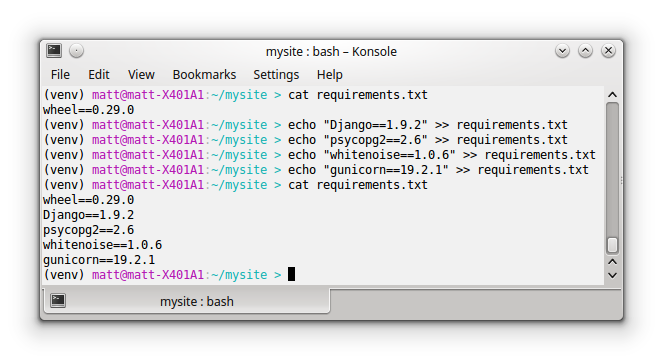
Step 6: Add Packages to the Requirements File
Next, add the following packages to your requirements file. This method is only really recommended when you want to install a particular package version. Alternately, you can install your packages using pip install, then save the entries into requirements.txt by using the pip freeze command mentioned above.
-
- Django - Python web framework
- psycopg2 - PostgreSQL database adapter
- whitenoise - static file server (css, javascript, images)
- gunicorn - Python WSGI HTTP server for UNIX
|
|
Step 7: Sign Up for Heroku
Now you’ll need to sign up for Heroku. Write down your password so you can connect your machine’s instance to your account.
Once you’ve signed up, install the Heroku toolbelt.
|
|
Now we can login to Heroku through the terminal and create our Heroku app! On the first login, the toolbelt, dependencies, and core plugins will all get set up for you (this may take a few minutes). Once this is done, you’ll be prompted for your email and password.
|
|
After you’ve logged in, you can go ahead and create your project on your Heroku account.
|
|
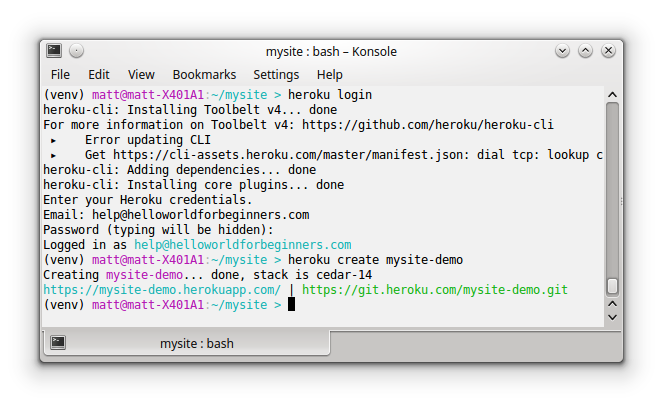
Our project has been created! Note the web and git urls provided in the output. Very handy! Better yet, Heroku can open your web page in a browser. Just type heroku open in your terminal.
Now let’s navigate to our Heroku dashboard to set up our database and retrieve the connection details; we’ll need these to set up our app.
From the Dashboard:
- Click your project name.
- On the next page, under the Resources header, type postgreSQL into the search box.
- Choose ‘Heroku Postgres’ and select the ‘Hobby Dev - Free’ option.
- Now you should have a PostgreSQL database provisioned, so click the new link named ‘Heroku Postgres’.
- On the next page, click the database name to view the connection details.
- You will need the password in order to connect, so click show.
- Keep this page open for use in the next section.
Step 8: Configure Your Project for Heroku
Add the Procfile
This file goes in the root of your project, with no extension; it tells Heroku what process to run. Notice that we included the project name after gunicorn. This is so Heroku knows where to find the wsgi.py file.
|
|
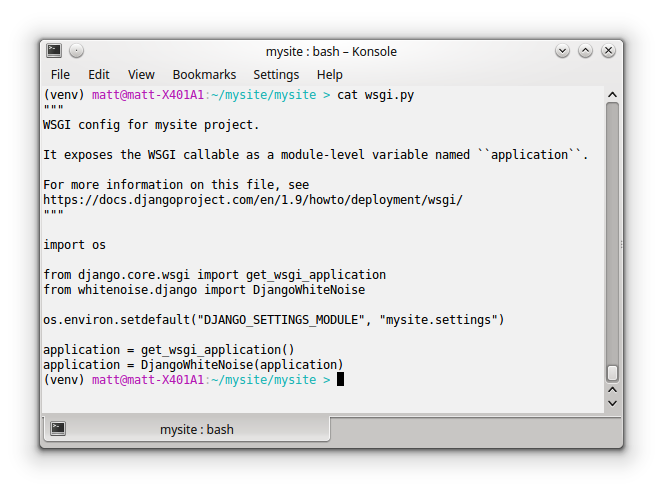
Update wsgi.py With Whitenoise
Update the wsgi file to include Whitenoise, which tells Heroku what static files to gather.
|
|
Add the following line to the imports:
|
|
Add the following line after the existing application = ... line:
|
|
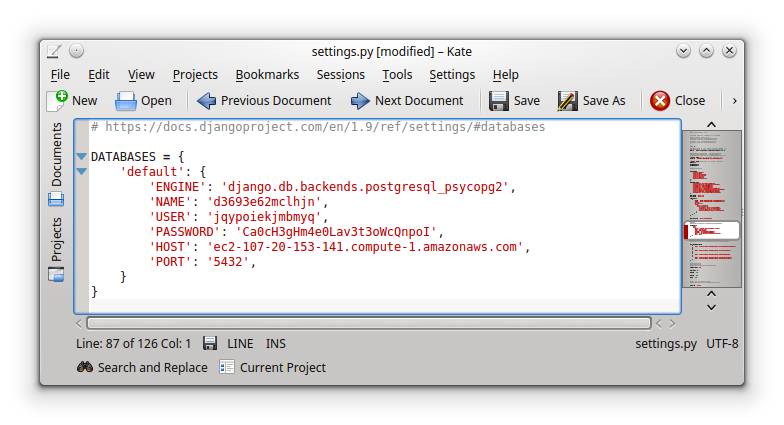
Update settings.py With Database Settings
Update DB info in settings.py with your Heroku Postgres information. I used a text editor here instead of pico, just for easy information transfer. The settings.py file is located in your projects PROJECT root folder (named the same as the project by default). In our case, that’s the ~/mysite/mysite directory.
Replace the DATABASES = [] section with your PostgreSQL database credentials. If you use the credentials from my screen shot, strange things might happen, so it’s probably best to use your own (lol, red flag)!
NOTE: Heroku Postgres’ Database field maps to the NAME field in the Django settings.py file.
Step 9: Add to Git and Commit
We’re so close I can taste it. Mmmm… Cheetos dust.
When we created our Heroku project, the toolbelt automatically added a remote for us, which saves us a step. Now, we just need to navigate to the project root, commit, and push the project!
First, though, I’m going to branch my GitHub project to preserve the files as they were before the Heroku setup.
|
|
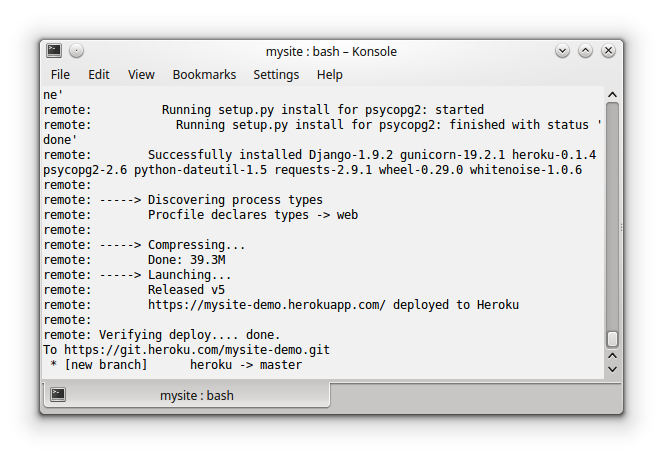
Issues Encountered During Heroku Build
I ran into an issue involving my branch. Since the requirements.txt file is currently only on the heroku branch of my git, and Heroku only cares about the master branch, it gets ignored. And as we discovered from the first issue, that file is needed for Heroku to build a Python app. To get around this, we alter the push command slightly, to push our local heroku branch to Heroku’s master branch. I ended up merging the heroku and master branches anyway. It turns out that with all the testing I was doing with the --amend and reset commands, I ended up pushing to GitHub without urls.py and view.py hello world configurations! I did warn myself that could happen, so it serves me right.
|
|
Step 10: Apply the Migrations
You may recall from More Nuts and Bolts of a Django App that we created the database using the migrate command. While it may seem intuitive to run this same command to migrate to our Heroku PostgreSQL database, it turns out that the migrations can’t be properly applied from a remote connection. Certain elements, such as new fields in your model, cannot be applied locally. Attempting to do so will result in a remote database that doesn’t match the models.py file. I learned this the hard way. At one point I had to dump my data into .csv files, completely recreate the database, then re-upload my data in order to get my local version in sync with what was in my Heroku instance.
Fortunately, I discovered that Heroku provides us with a way to run the Django command to migrate to a database from inside the Heroku environment. We can invoke this command on the Heroku server from our terminal window by prefixing it with heroku run. This tells Heroku to start up an instance on their server and run the command. There’s one more piece, and that’s the app name, which is how Heroku knows what migrations to apply to which app if you have multiple apps. Since we only have one, we don’t have to tell it which app to apply the migrations to.
|
|
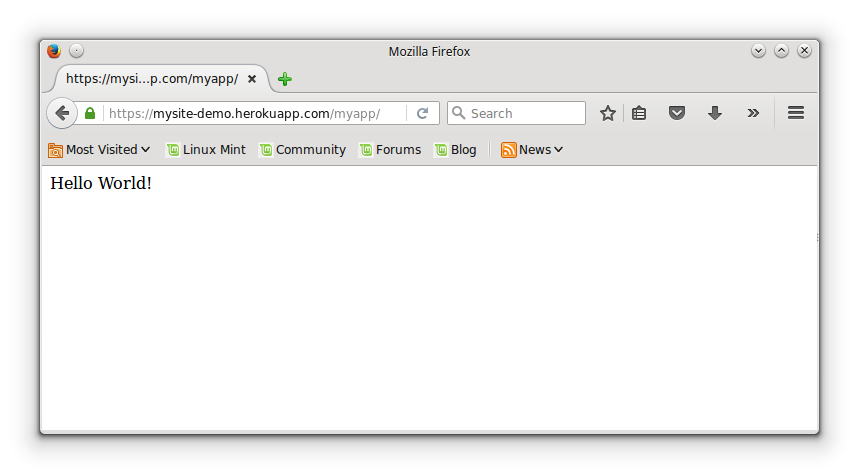
Step 11: Actually, It Goes to Eleven
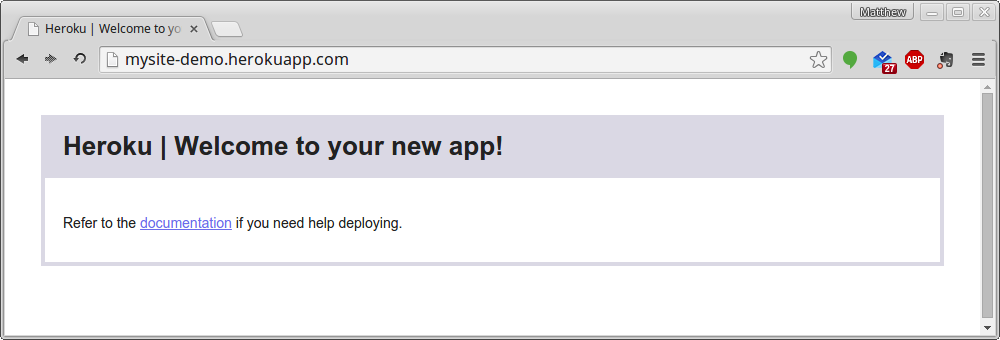
Congratulations! You can now view your app on the web! Simply type heroku open in your terminal, and a browser will open, pointing you to the root of your project.

But what’s this?! Page not found! Well, that’s because we don’t have a base project URL set up yet. All we set up previously was the /myapp URL. You can also see that the admin URL is available, which Django set up for us by default when we created the project.
Go ahead and tack /myapp on the end of the URL in your browser bar.
|
|
Success! Our web page is on the internet!