I’ve been checking Node.js out lately, and thought I’d share a quick Hello World using the Jade templating engine.
Get Node set up
From your terminal:
|
|
Then add this to your ~/.bashrc:
|
|
Don’t forget to source your .bashrc
|
|
Test the new environment variable
|
|
Install npm
|
|
Create your project

The key components:
package.json- meta data about the app, including dependencies
server.js- controller for the app; this sets up the server.
Procfile- tells Heroku how to start the server.
layout.jade- a jade template: define block names here
home.jade- includes jade, overrides blocks
Set up package.json and install the dependencies
The important pieces here are the dependencies. We’re telling our app to include the express and jade packages. Optionally, we provide a name and version, and set the private property, which just prevents npm from publishing the app to the package manager.
|
|
Next, install the dependencies listed in the package.json file.
|
|
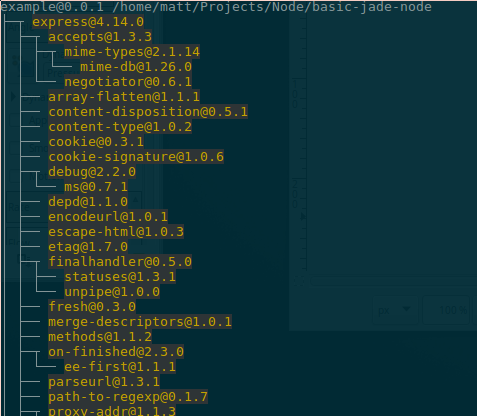
This will create the node_modules directory and download all the necessary packages. If you change your dependencies, you’ll want to delete this directory and run npm install again.
Set up a simple server.js
|
|
I’ll try to break this down.
First, we need to set Express up.
|
|
Once the express var is defined, we can set our template engine and point it to our views:
|
|
Now we need to tell our app how to handle URL routing:
|
|
Finally, we tell the server what port to listen on:
|
|
Test the project locally
At this point we can fire up the server, but we’ll have problems since the views don’t yet exist!
There are two options for running the app: npm start and node server.js
npm start:
|
|
node server.js:
|
|
In your browser, visit localhost:3000, since that’s what we defined in the last bit of our server.js file.
|
|
This error is telling us we forgot to add the view we’re referencing in our server.js file. So let’s do that.
Set up the views
Create a views folder, and within that, create a file named home.jade that looks like this:
|
|
Jade will render this into HTML for us, creating the body, and putting a paragraph tag inside it.
Now, restart your server with npm start or node server.js and refresh your browser. You should see ‘Hello world.’ If you right-click on the page and view page source, you’ll see your rendered paragraph tag:
|
|
Now let’s look at using template variables.
Using Jade template variables
In home.jade, change the line p Hello World! to the following:
|
|
Now, edit the line in server.js that defines the rendering to the home template.
Change this:
|
|
To this:
|
|
The values inside the {} within the render function call are a list of variables that can be used by the jade templates. When home.jade is rendered, #{somevar} will be replaced by world.
To prove that this works, change the value of {somevar} in server.js to ‘something else’, restart your app, refresh your web page, and you should see ‘Hello something else.’
Extending Jade templates
Additionally, you can extend templates and override values of fields which exist in the templates being extended. This is useful for keeping the layout consistent across many web pages.
Create another file inside the views directory named layout.jade. Add the following code:
|
|
Here we’ve defined the doctype and language to be used, a default title of ‘Example title’, and two three blocks with aliases to be added to our body: scripts, content, and footer. This ensures that every page that extends layout will automatically have a title of ‘Example title’, content that displays ‘this is some default content’, and a footer that displays ‘this is a default footer’.
Next, edit home.jade to look like the following:
|
|
We’ve overridden the page title and the content block. The layout footer was unchanged, and should print out exactly as it is in layout.jade.
Restart your server and refresh your browser, and you should see:
|
|
Defining a public static directory
This is where your client-side javascript files go. Create a directory at the root of your project called ‘public’, and inside that, create a directory called ‘javascripts’.
Then in your server.js, tell express to use this as the static files directory:
|
|
Now add a basic javascript file to the javascripts directory.
|
|
Finally, load this file up in your layout.jade file.
|
|
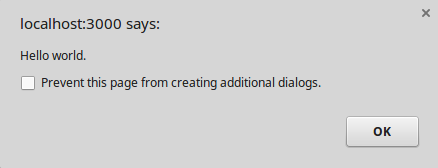
Restart your server with npm start or node server.js and refresh your browser. You should see an alert that reads ‘Hello world.’
A note on the browser console
The file we just added is a client-side javascript file. This means it will be executed by the browser.
We can add log statements to this file which will print out to the browser console, allowing us to debug our app and see what it’s doing.
The snippet would look like this:
|
|
The console in Google Chrome can be accessed by right-clicking on the page, and choosing ‘Inspect’. This will open the developer tools view. Click the ‘Console’ header.
Now when we refresh our page, we should see our log statement print out to the console, along with information that’s actually useful, like our scripts failing to load. You can see this by putting in a bad import using a non-existent file in your layout.jade file.
There’s other useful stuff here, like the ‘Sources’ tab, which lets us view any script files we’ve loaded.

Finally, let’s configure our app for deployment to Heroku.
Tell Heroku where the app’s entry point is
We define the entry point using the Procfile. Create a new file at your project root named ‘Procfile’ with no extension, and put the following contents inside:
|
|
This tells Heroku to execute the command node server.js when we deploy to our Heroku repository.
Publish to Heroku
At this point we can push to Heroku.
|
|
I like to use mybranch:master so I can commit to a testing branch yet still have the ability to see whether the deployment will successfully install all dependencies in Heroku’s servers and not blow up when I hit the entry point.
You can also test the app locally by running the command heroku local and visiting localhost:5000, but this won’t test the remote dependency installation (or static file downloading if you have that configured).
|
|
Fire up your app’s URL and you should see the same results as with the local test!
|
|